Kegging and Carbonating
Get your Kegging and Carbonation Right with our guide here at Cannon Hill Brewing
Kegging and Carbonating, as well as Line balancing all really affect the quality of your craft homebrew. Understanding how to properly keg, carbonate and pour your beer will help give you reliable results every time.
Often the limited, erroneously detailed or forum based instructions won’t help the kegging setup. They lead to an over-carbonated, foaming product. Here we’ll help you find a way through the maze of conflicting and unhelpful advice.
With little effort and our tips, you can have great carbonation for your beer.
Kegging and Carbonating – The basics
Kegged beer is not instant beer!
Homebrewers who have recently switched to kegging are sometimes of the mistaken belief that as soon as the gas is in the beer its ready to drink. While this may be true from a physical point of view, beers almost always greatly benefit from a period of maturation. Most noteworthy are the home brewers who adhere to the “force carbonation” method. Almost always they will tell you how great their beer was – “towards the end…”
This catch cry is due to green beer that is still gradually maturing. Why not just wait until all of the beer in the keg has matured? Have a little patience, go support your local craft brewer. While you are enjoying a cold one, your own beer will be quietly achieving a greatness of its own.
How long does it take?
It takes a little longer to mature beer than it does to carbonate it. Therefore there is no need to race the gas into the beer. Advocates of high pressure, mechanical action (such as shaking, rocking and rolling) and pressure manipulation (such as High pressure, venting, reverse booting and pouring pressure etc) will fall into this trap. This results in carbonated green tasting beer.
Read on for why!
Bottling Vs Kegging
Traditionally, brewers at home, bottle conditioned their beer. Brewers achieved this by adding a small, measured dose of fermentable to each bottle to create a short second fermentation in the bottle. This produced the CO2 that carbonates the beer. A cap prevents gas escaping, consequently, it dissolves into the liquid, carbonation is the result. The amount of CO2 produced can be varied to cater for different beer styles simply by varying the amount of fermentable added.
When we are kegging our beer, the gas is introduced into the beer from an external cylinder of CO2 . Rather than CO2 produced during the secondary bottle fermentation. The amount of gas absorbed into the beer depends mostly, on just 2 factors
- The temperature of the Beer
- The pressure applied
Equilibrium Pressure
First of all, is equilibrium pressure. This is the temperature and pressure combination where the beer will not absorb any more gas, nor will it loose gas already absorbed.
For every temperature and pressure combination, there is an equilibrium pressure. Especially relevant to kegging are the temperature /pressure combinations that fall into the range of combinations most relevant to correctly carbonated beer. No guesswork required, we can confidently let chemistry and physics do all the work.
Henrys Law
“At a constant temperature, the amount of a given gas that dissolves in a given type and volume of liquid is directly proportional to the partial pressure of that gas in equilibrium with that liquid.”
Brewers are rather fortunate in that the temperature is pre-set for us, that is, our serving temperature is usually constant.
So, the next thing to consider is the carbonation level required for the beer style we are serving.
This is expressed in volumes. For instance, a 2.5 volume beer contains 2.5lt. of CO2 dissolved per litre
Typical CO2 levels for common styles in volumes.
| Australian, Japanese Lagers, Wheat Beers | British-Style ales | Porter/Stout | Belgian Ales | European Lagers | American Ales/Lagers | Lambic | Fruit Lambic | German Wheat |
|---|---|---|---|---|---|---|---|---|
| 2.7 – 3.0 | 1.5 – 2.0 | 1.7 – 2.3 | 1.9 – 2.4 | 2.2 – 2.7 | 2.2 – 2.7 | 2.4 – 2.8 | 3.0 – 4.5 | 3.3 – 4.5 |
Now that we know the temperature and carbonation level required the rest is easy. We can use a very simple table to set our regulator to the correct pressure.
To use the chart below start by
-
- Measure the temperature of your beer at your usual serving temp.
- Find this reading on the left of the chart
- Scan right till the cell contains closest to the carbonation volumes required
- Look up to the top and locate the pressure you need to set your regulator

Carbonation Pressure For Kegging
The easy kegging method
- Cleaned and sanitise the fermenter tap, racking hose and keg.
- Purge the keg with CO2 to reduce exposure to oxygen.
- Transfer the finished beer from the fermenter to the keg via the racking hose and fermenter tap.
- Once filled, and the lid is replaced and closed, connect the grey gas connector to the gas in post, purge again and place in the fridge.
- Set the regulator to the pressure required pressure, typically this is between 12 and 15 PSI.
Now the hard part – Do not connect the black beer out connector for 2 weeks minimum 4 is better. Don’t touch the regulator, don’t shake it, don’t fiddle with it, just leave it alone, it will become beer all by itself, and be better for it.
Now the catch:
Once we have patiently carbonated and matured our beer we need to maintain the temperature and pressure constantly. I often tell people they could steal the knob off my regulator and I wouldn’t know for years because I never need to change the pressure on it.
Maintaining this required pressure, however, it does create one easily remedied problem for us. Home kegging setups usually have taps in very close proximity to the kegs. Sometimes this is less than 1m. Beer at the equilibrium pressure in such short beer line would (does) rush from the tap too fast, causing excessive foaming.
At first thought, one might be tempted to reduce the regulator pressure to compensate.
This a bad idea! It is the beer equivalent to a diver getting decompression sickness! And for the same reason.
This would effectively be setting a new equilibrium pressure, therefore leaving the beer in an over-carbonated state for the new pressure. Beer (like the dissolved gas in a diver’s blood) will always tend to move to equilibrium. And therefore will begin to de-gas causing excessive foaming and bubbles in the line. This probably hurts more the diver’s tissues, I suppose. For beer’s sake, the solution is simple. Maintain the required pressure and simply increase the length of beer line. Doing this is to allow for increased resistance to flow in the line and give us the required pressure drop at the tap. Pressure drop is only due to resistance to flow. Once the tap is closed the small amount of beer in the line is once again subjected to our set equilibrium and won’t de-gas in the lines.
Line Balancing
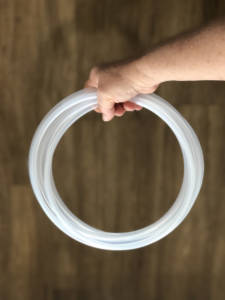
The length required for most home setups is between 3-4m of 5mm id beer line. You should be able to pour a good pint in about 20 seconds. With 4 metres, this makes a small neat bundle secured with a zip tie or velcro. You also don’t need an exact length for each beer style. The most commonly tapped beers usually have a good deal of overlap and a workable compromise can usually be achieved. For those other occasions when you absolutely have to have a 4 volume wheat on with a 1.6 volume Stout you may need to use a dual pressure regulator or inline regulator.
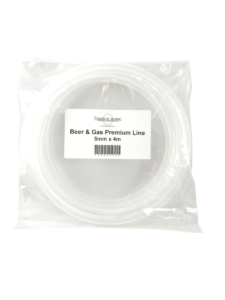
Beer and Gas Line- a step towards better carbonation
If you think 20 seconds is a long time to wait, you must consider two things. Firstly – how much longer it takes to pour foaming beer. Secondly, if your patience does not stretch to 20 seconds for a beer, maybe, perhaps, probably, brewing is not for you.
The real problem
The most common kegging problems usually stem from brewers not being sufficiently ahead of production for the usage. They end up taking drastic measures to get the beer flowing at all costs. Some easy solutions are increasing the number of kegs and/or fermenters in use. Therefore always be on the lookout for a spare fridge. You really can’t have too many and they are not great consumers of power. Especially compared to going to the bottlo’ for beer, they are downright money savers.
William Henry – Chemist
It not like all this carbonation stuff is a new thing. There was a bloke named William Henry who did work on the subject back in the early 19th century-more than 215 years ago!
Keen to learn more? This is a great resource for kegging: